


SRI LANKA - EXPLORING THE TEARDROP OF INDIA ON ...
Hey guys! This month we're bringing you a trip that's becoming very popular lately, and we think you'll love it! Sri Lanka, or "Ceylon," is an island nation in Asia,...
SRI LANKA - EXPLORING THE TEARDROP OF INDIA ON ...
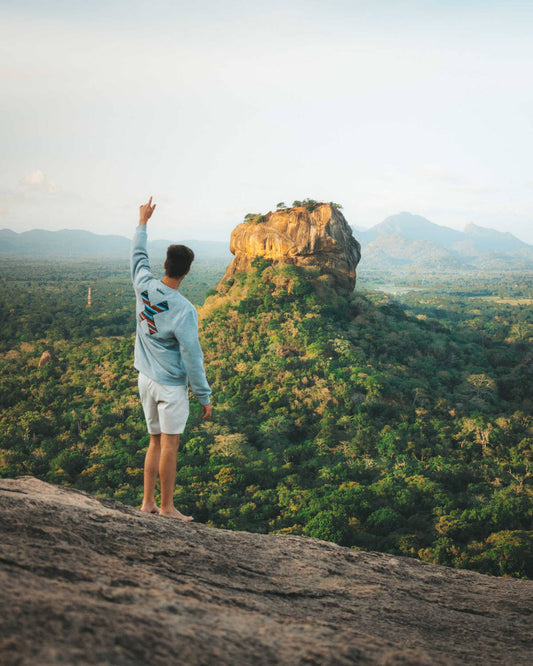
Hey guys! This month we're bringing you a trip that's becoming very popular lately, and we think you'll love it! Sri Lanka, or "Ceylon," is an island nation in Asia, located in the Bay of Bengal, also known as the teardrop of India. If you have an adventurous spirit and enjoy exploring new cultures, Sri Lanka won't disappoint you. A total of 13 nonstop days, traveling from the beach to the island's highest mountains, connected by a blue train that you can hang from the door. This time, we're suggesting a SUPER LOW-COST trip, although we encourage you to add your own twists to make it special. We're leaving you with MyMaps as usual so you can take a look at the route: Day 1 - Arrival at Colombo Airport + Bus to Anuradhapura Day 2 - Temple Bike Rides and Sunset Swim (Anuradhapura – Triconmalee (Upuvele)) Day 3 - Day of walks, volleyball matches and temples (Upuvele) Day 4 - Pigeon Iceland Diving and Bus to Sigiriya (Upuvele – Sigiriya) Day 5 - The Lion's Rock in Sigiriya and 7 hours by bus to Dalhousie (Sigiriya – Dalhousie (Adams Peak)) Day 6 - Climbing Sri Lanka's highest mountain and taking the blue train (Adams Peak – Ella) Day 7 - Visit to the tea plantations and excursion to Ella's Rock (Ella) Day 8 - Trip to Arugam, the PLACE TO BE in Sri Lanka (Ella – Arugam Bay) Days 9, 10 and 11 - Surfing all day in Arugam Bay (Arugam Bay) Day 12 - Beach day in the south of Sri Lanka (Arugam Bay – Tangalle) Day 13 - Going back home (Tangalle – Airport) TIPS for the TRIP After this brief introduction, we'll share the itinerary and our experiences on the trip. Let's go! Day 1 - Arrival at Colombo Airport + Bus to Anuradhapura We landed at Colombo Airport (the capital of Sri Lanka), went through visa control, and collected our checked baggage. We exchanged some cash (the airport doesn't usually have the best exchange rates) and bought a SIM card for data (from DIALOG, you get 4GB for 800 LKR). We asked at the airport tourist office how to get to Anuradhapura since neither of us had looked into travel information. In short, we started the trip feeling very lost. We left the airport and found ourselves surrounded by taxi drivers, who, as is common in Southeast Asia, were waiting at the airport entrance to take us. ** I don't recommend getting these as they tend to be a bit pricey. We take a bus from the airport to the central bus stop in Colombo. This bus costs 130 LKR, which is approximately 60 cents, and takes approximately one hour to reach Colombo. The bus drops us off at the Colombo bus stop, which at first glance seems like a madhouse; there are 100 buses, all moving in no particular order. We look for the bus to Anuradhapura, find it, and are told it leaves in 5 minutes, so we have time to buy a couple of drinks and some food, since the trip takes about 6 hours (it costs approximately 200 LKR). The bus ride is incredibly difficult; they drive terribly, and the bus is so crowded that there's no room to even stretch our legs. When we arrive, the tuk-tuk drivers start pestering us to get into their tuk-tuk to go to a hostel they say belongs to someone they know. We ignore them and walk about 200 meters away. There, with the help of the guide, we find a hostel called FRENCH GARDEN, where a night in a four-bed room costs 5,500 LKR. Being tired, we don't want to look any further, so we decide to stay at that hotel. They're quite friendly, although we can't get the price down. We shower and go out to dinner in the town center. There are several cheap and somewhat shabby restaurants, but the food is typical Sri Lankan. We're exhausted from the trip, so after dinner, we take a short walk and go to sleep. Day 2 - Temple Bike Rides and Sunset Swim (Anuradhapura – Triconmalee (Upuvele)) We got up around 8 a.m. since we were exhausted from the previous day's trip. We had breakfast at the hostel and rented bikes there (400 LKR per person) to visit the temples in the area. At the hostel, they gave us a map with the most important temples in the area, and we planned a route to see them all. Of course, between temples, we competed to see who got there first, and we got a few shouts from the frightened locals. You have to pay up to €25 to enter some temples! ** I recommend going only to the free temples as there isn't much difference with the paid temples. **It is important to bring something to cover your knees and shoulders, as it is necessary to enter most temples. We spend the night visiting temples until 2 p.m. because the taxi we hired to go to Triconmalee leaves at 3 p.m., as there are no more buses to get there. At 3:30 p.m., we take a taxi and pay 8,000 LKR for a 2:30-hour ride. On the way to Triconmalee, we read in the guidebook that a good place to sleep is Upuvele Beach, 3 km north, so we tell the driver to take us there. We find a beachfront hostel called Shivas, where the night costs about 8,000 LKR for a room with six beds. After dropping off our backpacks, we head to the beach and swim while watching the sunset behind the palm trees. We took the opportunity to book the dives at Pigeon Island as they are usually full for the following day (they cost around 75 euros for 2 dives the same morning). Another activity you can book is a snorkel trip at Pigeon Island, and the dive sites you can book are located right on the beach. We shower and go to dinner at a restaurant on the main road right next to our hotel. The food is good and cheap. After dinner, we go to sleep. Day 3 - Day of walks, volleyball games and temples (Upuvele) We got up very early to watch the sunrise on the beach. After chilling for a while, we went to the hotel for breakfast. We weren't sure what to do, so after breakfast we asked the hotel owners, and they told us we could visit the Salli Muthumariyamman Temple. We started walking north along Upuvele Beach. After walking for an hour, we came to a river. We looked for a nearby bridge, but in the end we decided it would be easier to swim across. Luckily, the river doesn't have much current, so it was quite easy, and the water was only 1.5 meters deep. Once we crossed the river, we climbed a rock and reached the temple. It's a very different temple from the others, colorful and well-maintained. We lay down to rest on the sand after our wonderful hike. On the way back to the hotel, we found a lively bar, Fernando's Bar, with a volleyball net and tables on the sand. We decided to eat there and play a few games of volleyball with a group of French people. We return to the hotel and quickly change to take a tuk-tuk to visit the new temple in Triconmalee (Thirukkoneswarm Kovil). The ride from the hotel to the center of Triconmalee costs us about 100 LKR. On the way to the temple, we pass a soccer field where some locals are playing a game. They invite us, and we beat the hell out of them... but we end up dead. After the game, on the way to the temple, we passed by Fort Frederick, a granite and rock fort built in 1624 by the Portuguese from the remains of a destroyed Hindu temple. You have to enter the temple barefoot, so you have to pay 20 LKR to store your shoes. We arrived before sunset, which we really liked because it offers beautiful views of Triconmalee Bay. On the way back home, we looked for a restaurant for dinner, but since none of them appealed to us and we were very tired, we decided to return to the one we had the night before next to the hotel, where we were greeted with a smile. We had dinner and went to bed early because the next day they picked us up at 6:00 a.m. to go diving. Day 4 - Pigeon Iceland Diving and Bus to Sigiriya (Upuvele – Sigiriya) We woke up early and arrived at the dive resort at 7 a.m., had breakfast, and set up our gear. We were told there was a strong current and visibility would be a bit poor, but we went for the dive anyway. In the end, it wasn't so bad, and the site was amazing. ** I recommend taking the snorkeling trip as it is much cheaper and you see more or less the same thing. After the two dives we visited Pigeon Island, which has incredible crystal-clear waters with beautiful coral and white sand on the beach. The only downside to the trip is the large number of tourists on the island. But I still think it's worth it. Upon returning to the hotel, we pick up our room and go find the bus to Sigiriya. To get to Sigiriya, we have to take two buses: the first to Dambulla and then another to get from there to Sigiriya. We arrive around 7:00 PM and, of course, miss the connecting bus. Luckily, an hour later, a local man picks us up in his car and drives us to Sigiriya. We find a hostel with a room for 5,000 LKR with six beds and a fan. It's a bit cramped, but it's fine now. We drop off our backpacks and head for dinner. At the local restaurant, they explain that it's best to climb Pidurangala Mountain, as the Sigiriya (Lions Rock) archaeological site can be seen at sunrise. We go to bed early because the next morning a taxi will pick us up at 4:30 to take us to the foot of Pidurangala. Day 5 - The Lion's Rock in Sigiriya and 7 hours by bus to Dalhousie (Sigiriya – Dalhousie (Adams Peak)) We woke up at 4:15, and the taxi (900LKR) picked us up at 4:30 to take us to the entrance of Pidurangala Mountain. We arrived at the start of the hike, where you have to pass through a temple to enter and pay 500LKR to climb the mountain. The hike is very short, about 20 minutes, and fairly easy, except for a bit of rock climbing at the end. ** To climb Lion Rock you have to pay about 10,000LKR, while for Pidurangala it is only 500LKR. We arrived at the top just in time to see the sunrise, and it was truly spectacular. It's important to bring warm clothing, as it tends to get cold early in the morning. Around 10:00, we returned to the hostel, where they prepared a delicious breakfast after all the work! That night we had dinner at Ristorante Christl, 5 minutes from the hotel, and I highly recommend it too, because they were very fast and the price-performance ratio was good. After some good pizzas we went to bed early, because, of course, we had to get up early again the next day! After breakfast, we rested at the hotel and around 2:00 p.m. decided that the next day we would climb Adams Peak, a 2,240-meter mountain. We asked, and they told us we had to get to Dalhousie first. It's important to get to Dalhousie early, as the journey is very long. We took three buses and a taxi to get there around 11:00 p.m. The route is Sigiriya-Dambulla-Kandy-Hatton, followed by a taxi from Hatton to Dalhousie. We arranged the taxi and hotel from the bus from Kandy to Hatton due to time constraints. **Buses only operate during the pilgrimage season. The only way to get to Dalhousie is by taxi, which costs around 3,000–4,000 LKR each way. In Dalhouse, we slept in a hostel called Green House. It's pretty precarious (for a change), but since we don't need to sleep for long, we don't give it much thought. The Adams Peak hike starts around 3 AM. It's 12:30 AM, so we set our alarms for 3:30 AM and go straight to sleep. It's been a long day. Day 6 - Climbing Sri Lanka's highest mountain and taking the blue train (Adams Peak – Ella) The alarms sound, but it's impossible to get up. In the end, we all get up at 4:15, and at 4:30 we start the hike. It's not raining, but it seems cloudy. This is normal at this time of year; often, after sunrise, the sky clears up. Imagine a very steep, almost vertical mountain covered in lush vegetation. After climbing more than 5,500 steps of varying height, you reach a sacred temple hidden at the top, shrouded in clouds. After 2 hours and a half of climbing stairs, we reached the top. You can't see anything and it's quite cold, but we're happy because it's something you must do in Sri Lanka. We got off and arrived at the hostel at 9:30, where we arranged a taxi for 10:00, as we wanted to catch the 11:15 train from Hatton to Ella. The taxi driver arrived a little late, but then drove fairly quickly, and we arrived just in time to buy our train tickets. ** We decided to take the 11:15 train because we were told that the 13:00 train was always very full. The best thing to do is get a seat and see the entire route from Hatton to Ella through the window. The journey takes about 5 hours. The first two hours have good views to the right, and the next three to the left. The scenery is spectacular, and the train is very cheap. Six tickets cost around 1,000 LKR in second class. We arrived in Ella and were exhausted and a little overwhelmed by the train, as it was quite full and we had barely slept. Upon arriving in Ella, the usual thing happened: 40 locals came offering tuk-tuks and accommodation. Luckily, a very friendly woman came up to us and offered us a place to sleep for 500 LKR per person per night with breakfast for 200 LKR: the Holiday Home Guest Inn, which is also an eight-minute walk from the center. We had dinner at a restaurant called Rasta, where we had delicious local food. After dinner, we went to the famous Ella Cafe Chill restaurant for some beers. Dinner might be a bit pricey because they serve Western food, but it's worth it since there's a great atmosphere. It gets chilly at night, so it's a good idea to pack a sweater before going out to dinner. Day 7 - Visit to the tea plantations and excursion to Ella's Rock (Ella) We get up early again, have breakfast at the hotel, grab a couple of bottles of water, and head off to see the tea plantations. The lady at the hostel recommends we go early to see the locals at work. You can visit the tea production factories, but we decided to see only the plantations. After the plantations, we decided to climb the small mountain of Ella's Rock. We asked a couple of locals, and they told us it was best to hire a guide. We skipped the guide because we wanted a bit of an adventure, even though we knew we'd get a bit lost... but that's why we came! The great thing about this hike is that there are many different paths, and you can create your own route. It's truly worth it, but it's very important to bring water because it can get hot during the day. From the peak, you can see the entire Ella Valley with all the tea plantations. A hike up is highly recommended! We return exhausted and end the day at Café Chill drinking some beers with a group of Italian women. Day 8 - Trip to Arugam, the PLACE TO BE in Sri Lanka (Ella – Arugam Bay) We woke up early to have breakfast and go find the bus to Arugam Bay. The bus leaves at 7 AM and we make a stop in Monaragala before finally arriving at Putuvil, the next town over. From Putuvil, you have to take a tuktuk that costs 250 LKR to get to Arugam Bay. Upon arriving at Arugam Bay, the bus drops you off at the most central part of the beach. From there, we started looking for hostels as usual, ending up at Samantha's Folly for the first night (a few beachfront cabins, the cheapest option at 5,000 LKR). After dropping off our bags, we went looking for somewhere to eat. Unfortunately, it was a holiday, but everything was closed, but we found a restaurant open that was not only very cheap but also very good, and the people who worked there were super nice. In the afternoon, when we're all exhausted, we go for a walk and look at the prices of surfboards to rent (approximately 700 LKR/day). We walk to the main point to check out the waves and we're really looking forward to surfing. On Saturdays, there's a really cool party at Mambo Beach. It starts around 10 a.m. and ends at 5 a.m. **Illegal alcohol can be purchased in small supermarkets (a bottle cost about 2500 LKR). We ended up having dinner at the same place, where we ate delicious rice with vegetables, and at night we had a drink at the hotel. Around 1:00, we started partying. Of course, we stayed at the party until the end! We watched the sun rise and went to sleep in the cabins. Days 9, 10 and 11 - Surfing all day in Arugam Bay (Arugam Bay) We woke up to rain, and that's when we realized sleeping in the cabins wasn't such a good idea. So we decided the best thing to do was find another hostel. The same people who run Samantha's Folly offered us the Lazy Bay Arugam Bay for 3,400 LKR/night for a three-person room with air conditioning. This second hotel is actually really good. It's very central and right across from the place where we always end up eating. In the afternoon we go to a surf shop to pick up the boards and get them for 2000 LKR for 3 days. We grab our boards and head to the main point to surf. The first day is incredible. The main point is divided into two parts: the pros' section and the beginners' section. ** It's important to be careful when entering and exiting the water, as it's very easy to cut yourself on the coral or rocks. This is especially true at low tide. We surf for two and a half hours, watching the sun set while we steal waves from each other. We leave exhausted but very happy, and head straight to dinner and bed, because the next morning we wanted to see the sunrise while surfing! We spent the next two days exploring the different surf spots in the Arugam area. Getting around requires a tuktuk, as some spots are about half an hour away. It's difficult to negotiate the price; the best thing to do is arrange it through the hotel where you're staying. One afternoon we went to Whiskey Point to surf, and just as the tuk-tuk was picking us up, a wild elephant appeared out of nowhere! So we took refuge in the hostel and canceled the surf session… we almost died! Day 12 - Beach day in the south of Sri Lanka (Arugam Bay – Tangalle) We got up at 5:30 a.m. to pack our bags. At 6:00 a.m., the tuktuk was waiting for us to take us to Putuvil, where the bus to Tangalle leaves. The bus isn't direct; it first stops in Monaragala before arriving in Tangalle. It took us about six hours to get there. When we got there, as always, many locals came trying to sell their hotel, but we looked on Google Maps and headed to the beach, where there seemed to be more. On the way to the beach, we asked around at a couple of empty hotels. We found a place that would let us rent it for 400 LKR. The place is called Sarath's. It's a bit overcooked, but for what we paid, we couldn't ask for more. After eating at a restaurant we found on TripAdvisor (Famili Restaurant), we took a tuktuk to Pehebiya Beach, where there's a really nice swing for taking photos. Next door is a cafe (Verse Collective) that's great for chilling out, and we took the opportunity to take some photos on the ropes at sunset. **During July and August, the weather tends to be quite bad in the south of the island; luckily, it didn't rain on us. We also recommend Unuwatuna Beach, one of the most famous beaches in southern Sri Lanka, next to Galle. We returned to the hotel for dinner at the same place where we had eaten and spent a good amount of time talking with the owners. They were all a great family; they helped us arrange a van to return to the airport the next day. Day 13 - Going back home (Tangalle – Airport) We woke up quietly and had breakfast around 9 a.m. Our flight didn't leave until 8 p.m., so we decided to do a little sightseeing in Tangalle, buy some traditional souvenirs for family and friends, and take a break from the long journey we'd endured. At 2:00 PM, the van picks us up and takes us directly to the airport. It takes about 3 hours, but it all depends on traffic (you never know in these countries). We arrive at the Colombo International Airport terminal, four hours early. We load our bags and bid farewell to Sri Lanka. PS: The entire stay cost us €300 per person, I don't think anyone can beat that! And that's all, folks! I'll leave you with a couple of tips that I think will be very useful for your trip. ENJOY! TIPS for the TRIP Check the weather first! For your luggage, it's a good idea to check the weather forecast for the areas you're planning to visit, but if not, you can always buy it at your destination. It's essential to pack a toiletry bag with basic medications, sunscreen, mosquito repellent, a raincoat, and a swimsuit. ** Tourist visas must be processed at least 48 hours before travel. This can be done at http://www.eta.gov.lk/slvisa/visainfo/center.jsp?locale=es_ES and the price is USD 35. It's hard to find establishments that allow card payments, so it's best to exchange cash in the villages. The exchange rate is usually €1 🡪200 LKR. They don't usually rip you off, but it's always a good idea to be cautious when exchanging money. Where to eat and sleep will depend on your tastes and amenities, but in this case, we suggest options for backpackers who want a real experience. The approximate cost per day is €10-30. The best thing you can do to eat locally is to look in a guidebook or on TripAdvisor. We found many excellent and very cheap restaurants. Drinking water should always be purchased in bottles; you can find it in supermarkets, restaurants, and small shops. It usually costs between 70 and 80 LKR. Most restaurants serve fried rice or noodles with vegetables, which average around 300 LKR. **If you don't like spicy food, it is highly recommended that every time you order a dish you ask them to not have it spicy, since it is normal for them to put spices in all dishes and many times they are very spicy. There are plenty of options for sleeping. When you arrive at a destination by bus, train, or taxi, there are usually many tuk-tuk drivers offering you places to sleep. My recommendation is to get away from there as quickly as possible, as they tend to be quite crowded. The locals are usually very friendly and will always try to help in any way they can, although they often don't understand a word of English. The cheapest rooms usually cost around 500-1000 LKR per person, depending on the amenities. ** One trick to get a lower room rate is to recommend them on TripAdvisor or Google Maps. ** Many hostels offer breakfast for an extra charge, usually around 200-400LKR, otherwise you can buy juices and biscuits for breakfast at the supermarket. How to get around There are various modes of transportation: bus, train, tuk-tuk, and taxi. In Sri Lanka, public transportation runs from around 6:00 a.m. to 7:00 p.m. (approx.). The bus is the cheapest way to travel long distances. It's usually very crowded, so for the most comfortable travel, it's best to take the first bus of the day. Ask locals for schedules and where the stops are; you can buy tickets on the bus. Driving in Sri Lanka is very bad, and it's a bit scary at first. They're overtaking you everywhere, and suddenly the bus slams on the brakes because it's about to hit someone, but you get used to it over time. The train is a must-see on your trip, especially the one connecting Kandy with Ella. The price is similar to the buses, and you can travel in three different classes. You'll find the famous tuktuks everywhere, and they're ideal for short distances. The price is usually around 100 LKR per kilometer, so it's a good idea to check the route beforehand on Google Maps. A private taxi/van is the most comfortable way to travel, but also the most expensive. However, sometimes it's the only option to get around because there are no buses or trains to get there. ** To know the best way to get to your destination, it's best to ask the locals, if possible more than one, because sometimes they don't even know you're asking, but they'll always answer with a big smile. Author Profile Axel Blanch He's a young adventurer who loves the sea and the mountains. He enjoys outdoor sports such as freeskiing, surfing, and all extreme sports. At Blue Banana, we're fortunate to have him on the team, and his mission is none other than to make this new adventure a reality and capture it in our brand through content with his own unique perspective, taking it to the next level. This isn't about what we do, but how we do it. And, along with Gonzalo Pasquier, they're responsible for demonstrating this.

RAJA AMPAT – LAST PARADISE ON EARTH
Hey! Today I'm bringing you one of the most spectacular places in the world: Raja Ampat. Still untouched and undiscovered, the islands of Raja Ampat are not easy to reach,...
RAJA AMPAT – LAST PARADISE ON EARTH
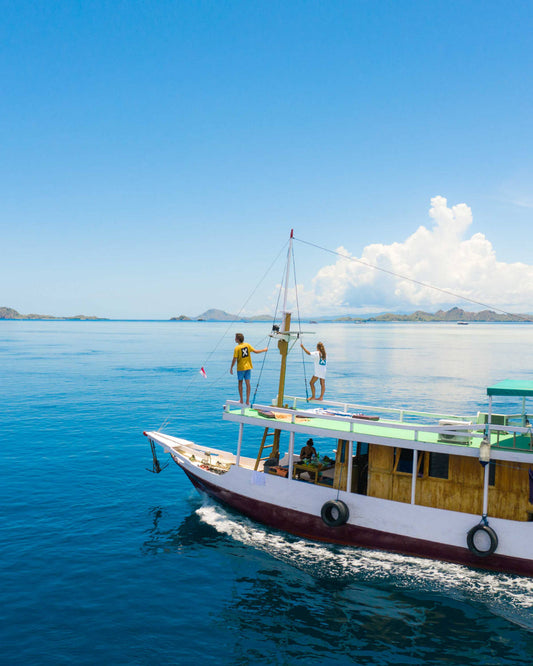
Hey! Today I'm bringing you one of the most spectacular places in the world: Raja Ampat. Still untouched and undiscovered, the islands of Raja Ampat are not easy to reach, and information about them is quite limited. This place is a must-see on your trip to Indonesia if you're looking for pristine landscapes, tranquility, and, above all, diving. Yes, because Raja Ampat is one of the hotspots for marine biodiversity, boasting the greatest variety of coral in the world and nearly 1.5 million hectares of protected land, creating an explosion of underwater life worthy of a visit for any diving enthusiast. Lorenzo Ferretti, one of our collaborators ( @lorenzowanderlust ), was there a few months ago, exploring the magnificent islands of Raja Ampat for 10 days, and he brought us all the necessary information to plan the trip and lots of tips that, once there, come in handy! The places we saw were the following (links to the days): ARRIVING AT RAJA AMPAT FROM SORONG TO WAISAI . FROM WAISAI TO KRI ISLAND TRAVELING TO KRI ISLAND GOODBYE BONUS As always, I'm leaving you a mymaps with the route so you can find your way around the map! ARRIVING AT RAJA AMPAT Raja Ampat is located off the coast of West Papua, which is a remote area of Indonesia. The first step, from wherever you are, is to get to Sorong, the largest and most important city near Raja Ampat. The easiest way to get to Raja Ampat is by flying to the city of Sorong in West Papua. If you're coming from another country, the best option to get to Sorong is to fly to Jakarta (Java) first. Direct flights operate daily from Jakarta, although the cheapest includes a stopover in Makassar. They cost around €100 one way. If you're already in Indonesia, you can also consider Surabaya (East Java) and Makassar (Sulawesi), from which direct flights also operate daily. Surabaya in East Java is the best option for those who don't want to miss Mount Bromo (which we visited on our trip to record the new LINK collection). We opted to visit Raja Ampat first and then fly from Sorong to Surabaya to visit the Bromo area. If you're in Bali, the best option is to fly from Denpasar to Makassar and then take another flight to Sorong. Anyway, you have to arrive by plane! Once there, your next destination will be Waisai, the main city of the Raja Ampat Islands. FROM SORONG TO WAISAI Unless you're staying at a resort (which may include a private transfer directly from Sorong City), you'll need to get to Waisai on your own. Located on Waigeo Island, Waisai is Raja Ampat's main town and essentially a gateway to all the islands of Raja Ampat. There are two main options to get here: BY FERRY: The first (and cheapest) option is to take the Express Ferry, which departs twice daily from the port of Sorong. **Taxi drivers will ask you for around 100,000 IDR ($7 USD) for a 3km ride from the airport to the port. You can bargain it down to 50,000 IDR or less if you're patient enough! Boats depart twice daily from Sorong, at 9 a.m. and 2 p.m. (Sunday to Friday) and at 9 a.m. and 12 p.m. (Saturday), and take approximately 2 hours. Tickets cost 100,000 IDR (US$7) and can be purchased directly at the port, or even on the boat itself, so don't worry about booking in advance. BY AIR: The other option to get to Waisai is by air. Although websites like Skyscanner don't list them, two airlines operate this route: Susi Air and Wings Air (Lion Air Group). Susi Air, which flies three days a week; Monday, Wednesday, and Friday at 9:40 a.m. Wing's Air every day 10:20 am And as you may know if you've traveled a bit in Southeast Asia, flight times can change at any time and without notice, so it's always best to call and confirm your flight schedule! FROM WAISAI TO KRI ISLAND And just when it seems like you've arrived, there's still a little bit more to go! There are many journeys and it takes a long time to get there, but it's paradise... you didn't expect to arrive by plane, did you? (Well, before continuing, stop and take my advice, go to the supermarket next to the port, and buy the beer you need for the days in Raja Ampat, since on the islands there is nothing but the food cooked by the homestays!) There are different options here, depending on the island you want to visit and how much time you have. Since we had practically a week, we decided to divide our days between two destinations: Fam Island and Kri Island. These are the two main destinations in Raja Ampat, so whatever your route, we recommend you visit them! Regardless of your destination, you must change ports to catch the boat that will take you to your island. So, after exiting the ferry, you'll have to walk to a different port (a two-minute walk) where you'll have to pay the "Environmental Service Fee." What does the fee include? In 2014, the Raja Ampat Environmental Service Fee was introduced to generate the significant funding needed to effectively manage Raja Ampat's Marine Protected Areas (MPAs). This means that each traveler must pay a fee upon arrival. Keep your ESF purchase receipt because there are strict controls and they may require it at any port, island, airport, etc. The entry permit is valid for 12 months from the date of purchase. International Visitor Fee: 1,000,000 IDR ($65 USD) Domestic Visitor Fee: 500,000 IDR ($32.50 USD) After this break, we continue! Once at the port, your chosen resort (which will include private transportation) or the homestay family will pick you up by boat. The price is always shared per boat, so, although it's not easy, it's best to find other people traveling to the same island/homestay as you to share the costs. Locals generally don't live near homestays. Most of them live in villages on different islands, and they only visit their homestays when they have reservations. Therefore, unlike the rest of the country, in Raja Ampat it's advisable to book accommodations well in advance. TRAVELING TO KRI ISLAND If you're traveling to Kri, like we were, since it's the most popular of the islands outside of Waisai, you'll find other boats that go there fairly easily, so you can save some money by sharing the boat. Finally! We've reached our destination! Kri Island, a 1.5-square-kilometer island in the middle of the archipelago. There's no public transportation between the islands from here, but it's not hard to find other travelers willing to share the cost and explore the surrounding area. Especially to go to Pianyemo, the famous viewpoint of the islets. When we arrived, we went straight to our accommodation, a homestay. You see, in Raja Ampat, there are two types of accommodation: either stay with a local family or go to a luxury resort (which we couldn't afford, at the moment). So we stayed at a homestay. These are very basic bungalows built on the beach or over the water and run by local families. Raja Ampat has a website where you can book. The website is www.stayrajaampat.com; all the homestays are listed there. You can filter by location, price, activities, and other features. The most common price is 350,000 IDR ($23 USD) per person per night, including three meals. On the islands, there are only accommodations; I mean, there are no restaurants, warungs, or anything like that. Your homestay "mom" will be the one who cooks for you and your travel companions during your stay. That's why we can't recommend enough that you LOOK AT the REVIEWS of each homestay to see if they have a variety of dishes, since they always (and we mean ALWAYS) include rice and steamed vegetables, sometimes with eggs or fish. Breakfast was the hardest part, and you usually have a choice between fried plantains or white bread (literally, nothing else). TIP: When you buy your beers, buy a jar of jam too—it can save your breakfast! (You're welcome.) Keep in mind that when you stay with a homestay you won't have any other dining options, so shop around! Most homestays don't have 24-hour electricity. Power is typically provided from 6 p.m. to 11 p.m. by generators, so we recommend bringing a headlamp or small flashlight; it came in very handy for us! Water usually comes from wells and is then pumped and collected in large buckets. So don't expect much. The hardest part was adjusting to the shower, which in many homestays can be saltwater. And as expected, forget about Wi-Fi if you're not at a nice resort! Take advantage of the opportunity to unwind, and you'll post stories when you get back home! We spent a few days relaxing in paradise, and from Kri we took a few island-hoping trips, easy to plan through the homestay. We toured the surrounding islands, snorkeling and exploring islets. The underwater visibility is excellent, and the marine life is incredible. And best of all, the trips are super cheap—around 50,000 IDR if you get a good group of people or travel with several friends. On these day trips, the sun is devastating; avoid sunburn! Even if you're used to beach life, you're not in Fuengirola; the Raja Ampat sun is very strong! Make sure to buy a sunscreen free of chemicals that harm coral; you can find them under the name "reef save." We also did a few dives. We wanted to take advantage of being in a diving mecca, and Kri Island is one of the most popular spots in Raja Ampat, and for good reason. The reef at Cape Kri is simply incredible and well-known for its healthy and diverse coral. The average price we found for a dive was approximately IDR 450,000, €25, including equipment rental. The lowest price we found was IDR 350,000, €18, including equipment rental, for a dive right in front of the dive center. But if you don't want to or don't have a diving license, don't worry, the snorkeling in Raja Ampat is also impressive... take an Island Hopping trip and you'll see! *The Raja Ampat area is known for strong ocean currents between the islands, so be careful! After a few days exploring Kri and its surroundings, we booked a boat to our next destination: Fam Island. There, our daily plan was going to be the same, but we had a different objective: to visit Pianyemo, the most famous island in the area; some very photogenic islets surrounded by turquoise water. So as soon as we arrived at Fam Island, we booked the boat that would take us there, and the next day we spent the day exploring the area, the blue is out of this world and having it all to ourselves made it even more special. Wonderful! We enjoyed the views and a great snorkeling session, and packed our bags to continue our trip through Indonesia. These were undoubtedly very special days, during which we learned a lot about the local culture and literally immersed ourselves in their homes. Grateful for everything we had experienced and eager for more, we boarded a plane to Surabaya to explore a completely different landscape: the volcanic region of Bromo National Park. Here's a summary of the minimum expenses for the trip to give you an idea of your budget: 3,000,000 IDR, 170€ per person, round trip (Jakarta - Sorong flight), although it depends a lot on when you take it, maybe you can get it a little cheaper. 200,000 IDR, 12€ per taxi, from Sorong Airport to Sorong Port to take the ferry to Wasai and the same return trip (7€ each way) 200,000 IDR, 12€ per person, one way ferry ride (Sorong - Waisai), the same return journey (7€ each way) 100,000 IDR, €60 per person for the Environmental Service Fee, yes, it's very expensive, but it's the price to pay for having a well-protected site with such a wide biodiversity. 2,000,000 IDR, 115€, for the boat from Waisai to Piaynemo, but it's per boat, so the more people you find to share, the cheaper it will be! 600,000 IDR, €35, for the boat from Waisai to Kri, one way. 350,000 IDR, €25 per person, per night, including 3 meals – roughly the cost of the homestay. We, who were 2, making the trip from Waisai to Piaynemo - Piaynemo to Kri - Kri to Waisai (sleeping on Kri and Piaynemo islands), the total cost of transportation was around 4,300,000 IDR, which is 2,150,000 IDR, 125€ per person, but remember that the more you are, the less you will pay. Our trip in particular was 10 days long, we spent approximately €650. This price does not include diving and day trips that can be arranged from the homestays to explore the surrounding area: A day trip can cost anywhere from IDR 100,000 to IDR 10,000,000 per boat, depending on where you're staying and where you're going. Typically, if you plan to spend the night on different islands and take day trips near your homestay (10-15 km), the cost of a day trip is approximately IDR 400,000-600,000 ($27-$40 USD) per boat. GOODBYE BONUS: - Overwater bungalows! Overwater bungalows are amazing, but besides being beautiful, they have a couple of practical advantages. It's windier, which is a real relief since temperatures are quite high year-round. Plus, there are fewer mosquitoes than on land, and the price is very similar, so I wouldn't think twice if I were you! Author Profile Gonzalo Pasquier is a young Spanish adventurer and photographer. He lives and works for travel, and his photographs are inspired by his passion for nature. At Blue Banana, we are fortunate to have him on our team, and his mission is none other than to make this new adventure a reality and capture it in our brand through content with a unique perspective that takes things to the next level. This isn't about what we do, but how we do it. And Gonzalo Pasquier is the man in charge of proving it.
INDONESIA 2020 – FOR THE BOOKS
Hello! After many of you asked, we've decided that our next Adventure Journal will be about the trip we took to create the content for the new SS20 collection, to...
INDONESIA 2020 – FOR THE BOOKS
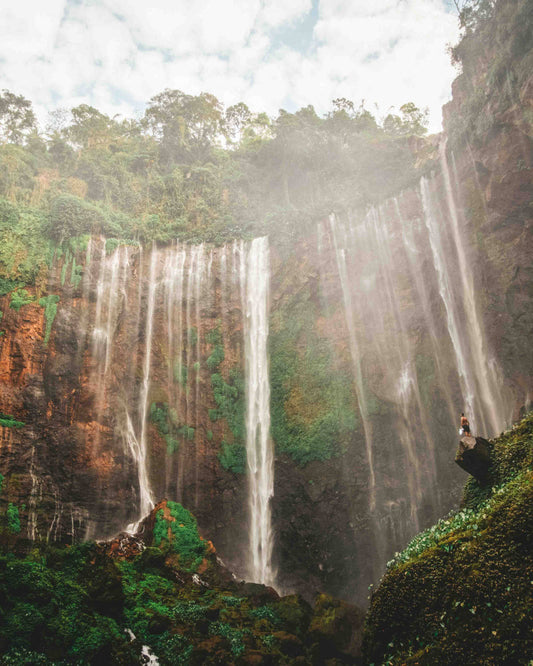
Hello! After many of you asked, we've decided that our next Adventure Journal will be about the trip we took to create the content for the new SS20 collection, to the islands of Java, Bali, and Komodo in Indonesia. It was a relatively short trip considering everything we visited. I recommend you set aside at least 15 days (minimum) to complete the entire route. We did it in 10 because we were filming, but it was very tight, and any setback could make you miss a flight and ruin the following days of your trip! But let's get down to business! Java, Bali, and East Nusa Tengara (Komodo) are located in the southern Indonesian island chain, bordering Borneo and Sulawesi to the north. They are relatively close, approximately an hour by plane each way, and have very different landscapes, although one thing they all have in common: sunshine and tropical temperatures. Links to the days: Day 0 and 1: Arrival in Bali and visit to Ulun Datu, Handara Gate, and two of the most beautiful waterfalls on the island. Day 2. Double failure to visit Tegalalang Rice fields and heading to Nusa Penida. Day 3: Kling Kling beach, Diamond Beach and -1 drone. Day 4. Back to Bali, we ran out of gas and almost missed the flight to Java. Day 5: We visit Rainbow Village, crash the spare drone and get lost to get to Wonokitri, a village that lives among volcanoes Day 6: A rude awakening, dreamy views before breakfast, and the journey to Coban Sewu. Day 7: We visited the most epic waterfalls in the entire country, and paid a premium to secure a drone for the last few days of the trip. Day 8: We set sail across the Sea of Flores and experienced an unforgettable moment. Day 9: Another epic sunrise, another broken drone. Our trip started in Bali, then we flew to Java and then to Komodo, from where we returned to Bali to catch the plane home. As always, I'm leaving you with a MyMaps to give you a better idea: I'm also leaving you our shooting schedule; it's designed to be in the busiest places at the best time, both in terms of crowds and lighting for photos/videos. So, it might also be useful if you want to avoid the crowds or if you're a photographer looking to capture the best light! Day 0 and 1: Arrival in Bali and visit to Ulun Datu, Handara Gate, and two of the most beautiful waterfalls on the island. We arrived in Bali exhausted and headed north to the Munduk area, about three hours away by car. There we spent the night at the Puri Sunset Homestay. The next day we woke up early and started off with enthusiasm! The day was going to be quite long. We started by visiting the Balinese temple (first and last). We spent about an hour with the temple to ourselves, were lucky enough to witness a local ceremony, and then headed to the next spot, a five-minute van ride away: the famous Handara Gate, a typical Balinese gateway. Being a little later, we had to wait in line a bit, but hey, there's not much to explore, so we took the 4 photos we went for and headed to the next spot, the Leke Leke waterfall. The jungle adventure began! It was barely 11 a.m. and we were in the middle of our third shoot of the day—we were on fire! The path to Leke Leke is beautiful and only takes 15 minutes, and the rewards are spectacular! But like all spectacular, easily accessible sites, I recommend going early in the morning to avoid crossing paths and have the waterfall all to yourselves! We finished shooting at the waterfall and ate at the restaurant right at the entrance. The vegetarian burger was highly recommended! We rested a bit and headed to the last location of the day, NungNung. It's one of the largest and most voluminous waterfalls in Bali; it's simply unique. The trail is a bit more complicated than that of Leke Leke, and it's also recommended to go early in the morning to avoid the crowds. It's the most famous of all Bali's waterfalls and is usually quite crowded. **Around 10am the light comes in just behind the waterfall and it's impressive, highly recommended to go at that time if you want perfect light! After a well-deserved swim in the waterfall, we returned to Ubud, had dinner at Rai Pasti Rice View, a restaurant with views of the rice fields and a great value, and rested until the next day. The first day had been very intense (as were all the days before, haha). Day 2. Double failure to visit Tegalalang Rice fields and heading to Nusa Penida. We woke up early, before the sun, around 5am, and headed to the first location of the day, the Tegalalang rice fields. Those typical Instagram drone photos? They're from there. On the way, it started raining really hard, and we arrived so early that there weren't any bars or restaurants open to wait for it to stop, so we decided to go back to Ubud, have breakfast there, and try again later. The second time we made it to the fields, but after walking for five minutes, it started raining again, and it didn't look like it was going to stop, so we took the opportunity to create some content about JAMBO's waterproofing, which, by the way, held up like a champion! That rain didn't look like it was going to stop (one of the disadvantages of going to Bali during monsoon season), so we decided to cancel the shooting sessions we had planned for that day and save time by heading to our next destination, Nusa Penida. **For those of you who want to visit the Tegalalang rice fields, they work like this: there's a path that passes through all the fields, but each plot belongs to a different harvester, and each time you pass a new one, they ask for a donation for maintenance. So, I recommend bringing plenty of small bills so you don't have to pay 100k IDR (€8) at each plot, because 1, 2, or 5k is enough. (I say 100k because that's the bills given out at moneychangers and ATMs.) Anyway, we took a taxi to Sanur, and from there, a boat to the island. We arrived after lunch, relaxed at the hostel, and watched the sunset from the beach with a few beers. Clearly, it hadn't been our day, so we took it easy and went to bed early because we had to get up early the next day! The hostel was called Full Moon, and I couldn't recommend it enough! The rooms are nice, and they have concerts at night that you can't miss. Day 3: Kling Kling beach, Diamond Beach and -1 drone. We woke up before the sun, as usual, and took the first photo shoot on the beach. We had breakfast and took the bikes to go to one of the most famous beaches on Instagram, if not the most famous, KlingKling beach! ** A good place to rent scooters is Abdul Scooter. It's next to the port and the guy speaks very good English. You can find him on Google Maps. **Highly recommended to go to KlingKling early or late in the day to avoid all the cars coming from Bali on day tours. During peak season, there can be up to two-hour lines to see the beach, plus the sun is deadly. So if you have a choice, don't even think about it! Fortunately or unfortunately, I had been to that beach four years earlier, when there was nothing and no one there, and the change seemed dramatic. When I went for the first time, the cliff overlooking the beach was almost impossible to reach because of the amount of vegetation. It was noon, and I was completely alone. This time, it seemed like a completely different place; there were more than 15 restaurants around the cliff, you had to wait in line for half an hour to take a photo with the beach in the background, and they had even made a path to get down to the beach… Wow. We shot Kling Kling and headed to the next spot, Diamond Beach, on the other side of the island. The road connecting the two beaches is spectacular, one of the most beautiful on the island, especially the last stretch! We arrived at Diamond Beach and started flying the drone to get some panoramic shots. Five minutes later, it got stuck high in a tree. With the help of a bamboo branch, we managed to bring it down, but not without breaking the stabilizer and one of the legs… Bali 1 – BB team 0. Thank goodness we brought another one just in case! We swam until dark, and just as we got out, four or five dolphins passed very close to the shore—amazing! With adrenaline pumping, we grabbed the bikes and headed home, without a drone, but very satisfied with the day of shooting we'd had. Day 4. Back to Bali, we ran out of gas and almost missed the flight to Java. The next day we woke up early and took the boat back to Bali. I recommend staying at least another day in Nusa Penida and also visiting Broken Beach and Crystal Bay. If you're going between May and October, take a boat for 200k IDR per person to snorkel with manta rays; it's incredible. The fishermen who take you are right in Crystal Bay, and you can book overnight or even on the same day, so don't worry about booking in advance. We took the boat back to Bali and a taxi to Canggu, a small town that has little Balinese flavor, as it's full of shops opened by Australians who spend long periods in Indonesia. It's the perfect place to change up your diet and get away from nasi goreng (chicken and rice), and to learn how to surf. A great place in Canggu for breakfast/lunch is Crate Caffe; the food is delicious and very reasonably priced! We ate there and then looked for a scooter rental place to do a session on the beach. It wasn't easy since many people didn't want to let us rent our scooters so we wouldn't get them covered in sand, but we found a place nearby: 35 Pantai Batu Bolong St, Dalung, Bali, where they rented us scooters without any problem. So we grabbed the scooters and went straight to the beach—to one 2km north of Batu Balong Beach, to avoid the crowds. We were there for two hours, driving around and being a bit crazy... we ran out of gas and were about to miss our 9 p.m. flight to Java, but in the end everything worked out and we flew to Java that night. We arrived in Surabaya around 10 pm and from there we took a taxi that took us to Malang, where we arrived around 1 am at the MADOR Malang hostel, very close to Rainbow Village, the place we were going to go the next day. Day 5: We visit Rainbow Village, crash the spare drone and get lost to get to Wonokitri, a village that lives among volcanoes . We woke up calmly, as we'd been through a lot these past few days, and looked for a place for breakfast. It was actually quite difficult, since Malang isn't a touristy city at all, and it's hard to find a place where rice isn't the only option for breakfast. In the end, we found a place quite close by called Java Dancer Coffee, which is highly recommended. We finished breakfast and headed straight to Rainbow Village, so named for its colorfully painted houses. Painting them was an initiative of the neighborhood's students to attract tourists, and they've succeeded. They charge €1 entrance per person and it's another source of income for the neighborhood, and we gladly decided to do our part. I'd like to share some drone photos of the houses below because they look so beautiful from above, but do you know the reality? While we were flying the drone, it fell into the river—a deep, brown river that was completely inaccessible. So we lost the spare drone with the Rainbow Village equipment just two days later, with many days still to go. It was a hard blow for everyone. We returned to the hostel and packed our bags. We looked for a drone shop in Malang and found two, but neither had what we were looking for. So we decided to do the next two days of sessions without a drone and buy one once in Surabaya, giving us more time to ask around and go for a spot of shooting. After going to two stores to try to buy the drone and then looking for a taxi to take us to the Bromo volcano area (with five people plus luggage, most cars were too small), we finally left Malang around 10 p.m. After a full day, we were dozing off after just one minute of travel. I woke up an hour later, and everyone was still asleep. I looked at the map and realized the taxi was taking us in the wrong direction, and the worst part was that he didn't understand a word of English. We managed to get him to understand that he wasn't following the wrong direction, but the guy insisted it was that way. In the end, after a few restaurant visits, we managed to convince him to listen to the map and not his intuition, and we headed for Wonokitri, a village with barely 20 houses very close to King Kong Point, the place where we were going to see the sunrise the next day. Four hours later, around 2 a.m., we arrived at the hostel, but there was no sign of the receptionist who was supposed to be waiting for us (we had warned him we would arrive around that time). But hey, in case you haven't noticed, nothing in Indonesia ever goes as planned; you just have to accept it and adapt, even if it's a bit difficult at first. Eventually, the hostel guy showed up, we checked in, and went to sleep for a while, since we were supposed to wake up at 4 a.m. to watch the sunrise in one of the most incredible places in the world! Day 6: A rude awakening, dreamy views before breakfast, and the journey to Coban Sewu. The alarm clock rang, and it felt like we'd barely slept 10 minutes. We woke up tired but eager, and the sky was overcast and very dark. We took the Jeep we'd booked through the hostel (Bromo Backpacker Tosari) and headed toward King Kong Hill. We arrived at the entrance to the national park in a sea of fog that couldn't have looked worse, but we still paid the entrance fee (€12 per person, the most expensive of the entire trip) and headed up... don't say we didn't try! We reached the top and there was already some light. The sun had about 20 minutes left until sunrise. Blurred in the background, we could see the silhouette of the Bromo volcano, and beyond that, that of Ijen... we could even see Mount Agung (Bali's tallest volcano). We were above the clouds. It was simply magical; the conditions were perfect. The light was unbeatable, the low clouds created beams of light that crossed the palm branches, and the smoke emitted by the volcanoes took on the reddish color of dawn... without a doubt, one of the best sunrises of our lives. We spent over two hours taking photos and enjoying the views before returning to the village. Our initial plan was to descend into the Bromo crater for another photo op, but it happened to be closed for environmental restoration from January 24th to February 24th, so we were left wanting more, although we found it completely understandable given the influx of tourists Bromo receives throughout the year. We took a team photo and headed back to the hostel. We had a leisurely breakfast and, without stopping, headed for our next destination, Coban Sewu, about four hours south. Coban Sewu is a deep, lush canyon filled with vegetation, cascading through a unique waterfall system. It's, for me, the most epic waterfall I've ever visited. We arrived at night, it was a small town, there were only 2 hostels available to book online, we stayed at Dear Traveller Guest House and Glamping And I couldn't recommend it more. The owner was very nice; since the supermarket was two kilometers from the hostel, he took us in his pickup truck to buy some beers, and the next day he took us to the waterfalls himself at no extra cost. He also arranged a taxi for us back to Surabaya to catch our flight... we honestly couldn't have left there happier. Anyway, we slept very comfortably, and of course, we got up early the next day. We wanted to have the place to ourselves, and we got it. Day 7: We visited the most epic waterfalls in the entire country, and paid a premium to secure a drone for the last few days of the trip. We arrived at Coban Sewu waterfalls around 6:30 in the morning, and after descending into the canyon for half an hour, we reached the foot of the falls without meeting a single person. We completed the shoot in a couple of hours and started heading back to the hostel around 9:30. If you have time, I recommend exploring the canyon a little further, as it has caves called Goa Tetes that are worth visiting, as well as some more waterfalls that you definitely won't want to miss! We arrived at the hostel, had breakfast, and took the taxi back to Surabaya around 11:30 a.m. We had a flight at 6:30 p.m., which was about a five-hour flight away, so we had plenty of time. We arrived in Surabaya around 3:00 p.m. and went straight to the drone shop we'd previously contacted to check if they had what we wanted (the Mavic 2 Pro) in stock. We arrived around 3:30 p.m., and the airport was about an hour away. The shop was in a shopping center, so we scrambled up and down the stairs to find it. We found it. They had the drone. We were ready to pay... BUT, they didn't accept any cards, and we didn't have enough cash, so we had no choice but to go to the other shop in town, which was also on the way to the airport. We arrived at the other store around 5 p.m. Time was getting tight, and we needed to buy it quickly, so we checked they had the one we wanted, paid successfully, and then sped off to the airport! There was half an hour until our flight was due to depart, and we were just arriving at the domestic terminal. We arrived and went straight to the counters. There, they told us that AirAsia operates in the international terminal even though it's a domestic flight, so we looked for another taxi and headed to the other terminal. It was 5:45 p.m. We arrived, and the flight had been delayed by an hour (for no particular reason; it happens often in Indonesia). We went to the AirAsia counter. There, they told us we'd missed our flight, and that even if it was delayed, the system wouldn't accept any more check-ins. What a bummer, in all its letters! We paid a high price to have a drone for the last few days of our trip. There was no other option, we bought a flight for the next morning directly to Komodo, and that night we slept in Surabaya near the airport. Day 8: We started sailing through the Sea of Flores and experienced an unforgettable moment. The next day, we arrived at the airport first, as expected... we didn't want to take any chances, haha. We arrived in Komodo around 12 noon and went straight to the port to find a boat that would accommodate us for the night and take us on a tour of the Flores Sea. It was easy to find, since the taxi driver who took us from the airport to Labuan Bajo (the coastal town from where all the boats depart) introduced us to his friend, who happened to own a boat and did tours of the islands. It often happens! It's a very expensive experience for Indonesia. To give you an idea, we paid around €100 per person for one night on the boat with all meals included. It was definitely the most expensive part of the trip, but also the most worthwhile. Between going to the market to buy food, the crew arriving, and preparing the boat for the tour, we ended up leaving at 4 p.m. We spoke with the captain to clarify the price and route we wanted to take, and we headed to our first and only stop of the day, Kelor Island, to watch the sunset. We did a shoot and flew the new drone successfully. The shots we got from there were amazing, and that alone made it worth it. Around 7 p.m. we returned to the boat, showered, and headed to Padar Island, where we were going to spend the night. The trip was quite an experience: the bioluminescent plankton glowed electric blue as the boat moved through the water, the sky was starry, and the Milky Way was visible like never before; it was incredible. We were just arriving when we suddenly started seeing blue shadows emerging to the surface... yes, they were dolphins, and with their movement, they lit up the water, turning it electric blue. Something my fellow travelers will never forget... because I was showering at that very moment and didn't see anything! Anyway, we arrived at Padar Island and went to sleep. I climbed onto the mattress and slept while looking at the stars. Cabins aren't my thing. Day 9: Another epic sunrise, another broken drone. We woke up early, around 5am, and the captain took us by boat to the beach where the excursion began. It was about a half-hour climb to reach the point from where you can see 3 beaches and the best panoramic view of Padar. It was strange to think that just two days ago we were on another island with a landscape of volcanoes that had nothing to do with what we were seeing... We flew the drone, shot for an hour, and returned to the boat. We went for a swim, had some delicious pancakes for breakfast, and headed to Pink Beach, our next destination! The beauty of Pink Beach is the colors of the sea, as well as the reddish sand. We decided to stay on the boat and film action footage, jumping and snorkeling a bit. If you're not filming, I recommend going to the beach; it's also very beautiful. We continued toward the Sandbar, a beach that emerges from the coral reef in the middle of the sea, with nothing at all. We were alone for half an hour, and it was the closest thing to a tropical paradise we'd seen so far. We did a little snorkeling, saw turtles, rays, and even a shark! We decided to fly the drone to get panoramic shots of the boat, when suddenly it started landing on its own in the middle of the sea... It seemed like a joke; we couldn't believe we were going to lose the third drone in just one week, when we'd all been flying drones for years and had never lost one. Anyway, yes, it landed in the water, but with our snorkel goggles, we recovered it and got all the videos and photos we'd recorded with it. Thank goodness it was the last spot we were able to film with the drone, and we didn't need it anymore, because wow. Still freaking out, we headed to our final destination: Kanawa Island. Exhausted from all the stress we'd endured, we only had the strength to have a beer and watch the sunset, commenting on how intense and epic the trip had been. We'd been sleeping an average of five hours for eight days and had visited three completely different islands in just one week—insanity. We missed a flight, crashed three drones, saw dolphins, ran out of gas in the middle of a beach, witnessed the most beautiful sunrise in the world... but what makes a trip truly special are the people we shared it with. We had our good times and some tougher ones, but we made the best of every situation. We all agreed that it was the best time we'd had in Indo-Pacific, and back in Bali the next day, before heading to the airport, we all decided to get a tattoo, just because, damn it, because the situation deserved it! And with two balls, we made an X as a souvenir of this great adventure. Indonesia BB Trip 2020 – For the books. Author Profile Gonzalo Pasquier is a young Spanish adventurer and photographer. He lives and works for travel, and his photographs are inspired by his passion for nature. At Blue Banana, we are fortunate to have him on our team, and his mission is none other than to make this new adventure a reality and capture it in our brand through content with a unique perspective that takes things to the next level. This isn't about what we do, but how we do it. And Gonzalo Pasquier is the man in charge of proving it.
Hello everyone again, I'm Gonzalo Pasquier, a photographer and lover of adventure and nature. I'm lucky enough to work at Blue Banana and share my travels and those of other...
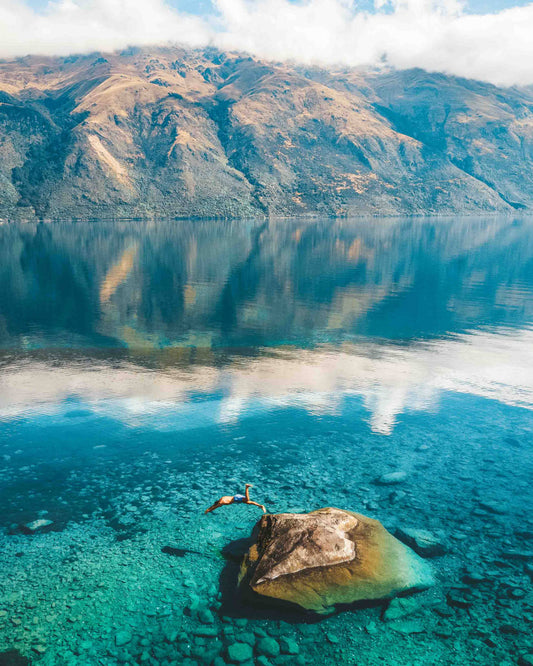
Hello everyone again, I'm Gonzalo Pasquier, a photographer and lover of adventure and nature. I'm lucky enough to work at Blue Banana and share my travels and those of other adventurers like me, so you can use them when planning your own. This time I'm bringing you a trip to one of the most special countries I've ever visited, New Zealand. New Zealand is a country located in the southwest Pacific Ocean, close to Australia and all those tropical paradises we see on Instagram every day, like Tahiti, where a global WSL event (World Surf League for the uninitiated) is held, or Moorea, a lost island where all the influencers take photos with rays and sharks in dreamy turquoise waters. Anyway, I'll talk about those places another day. This post is about the best campervan trip I've ever taken, and it was on the South Island of New Zealand. The places we saw were the following (links to the days): Day 1: Arrival in Queenstown, beer and relax seeing the town Day 2: We rented the van and headed to Milford Sound, stopping at Wakatipu Lake and 4,752,323 other places because everything is super beautiful . Day 3: Morning fine and heading to Glenorchy, a town we hadn't planned to go to. Day 4: The most improvised excursion of the trip and undoubtedly the best: Mount Alfred Day 5: We regain our strength with great views at Rob Royce Glacier National Park Day 6: We lose our minds climbing 2,200 steps in Aoraki National Park Day 7: We rested and enjoyed Tekapo Lake in the morning and ended up seeing seals 3 hours from the lake with a car instead of the campervan. Day 8: We return home, Australia. I'll leave you MyMaps so you can find your way around: Like all great trips, this one was improvised. But because we had no other option. We booked everything about a week in advance due to the RV rental, which worked out as follows: The problem is that many car rental companies offer a service called "relocation," which gives you a limited number of days to move one of their vehicles from one place to another for a much lower cost than a regular rental. This happens because most travelers take the reverse route from what we did, that is, they rent the campervan in Christchurch and end the trip in Queenstown. This causes a large backlog of rental vehicles in Queenstown, and as a solution, companies offer the reverse route for a much lower cost. However, the number of days is limited (5 to 8 in our case), and the offers come up on very short notice and go very quickly. To give you an idea, we paid $600 for an 8-day rental with unlimited mileage and comprehensive insurance. There were 5 of us, so about €70 per person—a steal for a country like New Zealand! The website where we rented the motorhome was this one: https://www.imoova.com/imoova/relocations You'll see that they also offer to start on the south island and end on the north island with the ferry paid, so if you have time I wouldn't think twice! Day 1: Arrival in Queenstown, beer and relaxation while seeing the town. Once we managed to book the relocation, we booked the tickets and headed to Queenstown, the adventure sports town. You can do everything: skydiving, rafting, paragliding, mountain biking, water skiing, and snow sports in the winter. It's a paradise for any adrenaline junkie! But we didn't do anything, haha. We arrived in Queenstown a day before the rental, as flights were cheaper and we were able to see the town while we were there. For our first stop, it wasn't bad at all, not to mention the prettiest town we'd ever seen. We took a walk and went for some beers, definitely the most relaxing day of all! That night we slept in a cheap hostel in the center called Base Backpackers Queenstown, and the next day we woke up early to check in the campervan, do some shopping, and head for the southern fjords. Day 2: We rented the van and headed to Milford Sound, stopping at Wakatipu Lake and 4,752,323 other places because everything is super beautiful. We woke up at 6 a.m., and while some went shopping, others went to get the campervan. By 10 a.m., we were already heading to Milford Sound, the only part of the fjords accessible by vehicle, and the only one you can visit in one day. There are fjord routes that start from Milford Sound and take you to wild waterfalls and lakes, but you'll have to dedicate three or four days, and they're not exactly cheap, since, as I said, you have to understand that New Zealand is expensive! Anyway, on the way to Milford Sound, we stopped at Wakatipu Lake; the water was as crystal-clear as it was cold, but we went for a swim anyway. Who knows if we'd ever go back there! I highly recommend the exact spot where we stopped, because it was an area of the lake that had sand and was like a beach, and you could park the van right in front of the water. It was called Kingston Lake Camp. After a good swim and a hearty plate of tomato pasta to kick off the road trip, we continued on our way to the fjords. We made a thousand stops because every place we saw seemed more beautiful than the last, but that's what it's all about, isn't it? The photo above is in Egliton Valley. We arrived at the last minute, and it was so good that we had it all to ourselves, look how cool it was: Aside from the spectacular scenery, boats depart every hour from Milford Sound that take you through the fjord to the open sea. They're reasonably priced, and with luck, you might even see dolphins and seals. But by the time we arrived, it was already closed, so there was no one around. One thing for another, you can't have everything in life! That night we had planned to sleep in a campsite nearby, but we went without a reservation and it was full, from there they sent us to another campsite that was about half an hour away, and when we arrived they told us that it was also full (you can't call because there's no coverage) and from there they sent us to another one 45 minutes away, but since we were so tired, we thought the most sensible thing to do was to look for and sleep in the first camp we saw, and that's what we did. Day 3: Morning fine and heading to Glenorchy, a town we hadn't planned to go to. Early the next morning, we learned it was illegal after a police patrol woke us up at 6 a.m. to fine us for sleeping outside the campsite in an area where wild camping wasn't allowed. We happily paid the $40 and continued on to our next destination, Glenorchy. Glenorchy is a small town near Queenstown that we hadn't planned to visit, but from the plane when we were about to land we saw a mountain in the middle of nowhere, surrounded by rivers that flowed into a huge lake and many snow-capped mountains around. We decided to find and climb that mountain, and so we did. We searched the area on Google Maps and found what we were looking for: Mount Alfred. And we included it in our schedule for the second day. The nearest town was Glenorchy, so this time we booked a campsite a few hours in advance and headed there. What we didn't know was the road to get there... WOW! We made a few stops along the way and arrived in Glenorchy. That night we had an early dinner and went to bed, as the next day was the day we'd climb Mount Alfred, which, from what we were told at the campsite, wasn't a walk in the park! The campsite was called Mrs Wolly's campground ;) Day 4: The most improvised excursion of the trip and undoubtedly the best: Mount Alfred: We woke up at 6, for a change. We had a hearty breakfast and headed to the starting point of the hike, which was 15 minutes from the village. These are the coordinates: -44.782594, 168.353443. It was a very, very exhausting hike, but as we gained altitude and saw more and more scenery, we didn't stop until we reached the top. And I don't need to tell you how brutal it was! We had the Alps on one side, Wakatipu Lake on the other, and in between were a bunch of turquoise waterways that looked like they were painted. We ate at the top and made our way back down at a leisurely pace, exhausted after nearly three hours of uphill climbing and over 1,000 meters of elevation gain. We arrived back at the campsite and, after a good nap to recharge our batteries, headed for our next destination, Rob Royce Glacier National Park. We only had a few days left and there was no time to waste! That night we slept in the national park parking lot, which has bathrooms and is legal. The last stretch (almost an hour) is unpaved and requires taking it easy. We arrived at night, and while one of us drove, the rest of us were up high watching the stars and seeing the deer and rabbits hiding when they saw us. Day 5: We regain our strength with great views at Rob Royce Glacier National Park The next day we took it easy; it was one of the first days and we were already exhausted... we were due for a more leisurely hike, a two-hour round trip to see the glacier and a waterfall, and as expected, it didn't disappoint! The suspension bridge in the video was straight out of an Indiana Jones movie. We took a leisurely afternoon relaxing in the meadows there, and at the last minute we headed to Aoraki National Park, one of the most famous places on the South Island and in New Zealand for having the highest peak in the entire country, Mount Cook, at 3,724 meters. F*CKING CRAZY! Day 6: We lose our minds climbing 2,200 steps in Aoraki National Park There were plenty of hikes to do throughout the national park, the typical and most popular, as it requires the least physical effort and rewards with spectacular views, is the Hooker Valley Track, 5 kilometers long and with 100 meters of elevation gain. However, we weren't in New Zealand's most famous national park for a walk, so we chose the Sealy Tarns Track, a very vertical route, with 2,200 steps to be precise, which offered the best views of the valley, with the glacier and Mount Cook in the background. We had climbed over 2,000 meters of elevation gain in 3 days, we were completely crazy, but we weren't planning on stopping until we caught the plane back home! Devastated but very happy, we finished the trip and booked a campsite very close to Tekapo Lake, the next point of interest we wanted to visit. We arrived at the campsite (Tekapo Motels & Holiday Park), showered, and between beers and card games we fell asleep, and that night we slept like logs. Day 7: We rested and enjoyed Tekapo Lake in the morning and ended up seeing seals 3 hours from the lake with a car instead of the campervan. The next day we had no excursions planned, just to see Lake Tekapo, and if the weather was good, we could go for a swim, sunbathe, and eat al fresco near the water. And that's what we did. The color of the water was unbelievable; it was a blue none of us had ever seen before, a glacier blue. We spent the last day of our motorhome relaxing and arrived near Christchurch Airport at midday to check out. But the trip didn't end there; our flight was the next day! Everything was planned. We dropped off the van and rented a car from the rental company across the street (they were all in the same location near the airport), and headed to Kaikoura, just over a two-hour drive from where we were. Kaikoura is a coastal town famous for being home to a wealth of marine wildlife. Depending on the time of year, you can see orcas, sperm whales, a wide variety of dolphins, and even penguins! But we weren't there for any of them; we went to see the seal colony that lives at Kaikoura Head, which is free! Honestly, we would have loved to see whales and dolphins, but we knew the prices weren't right. Now, if you can afford it, I recommend doing it from a small plane. If you're into these things, it could be the experience of a lifetime. Here's a link to a company that offers this spectacular service: https://www.airkaikoura.co.nz/ As soon as we arrived in Kaikoura, we went straight to see the seals; the sun was setting, and there was no time to waste. There were tons of them, maybe more than 100. The babies were all huddled together in a kind of natural pool, playing and screaming, and we were truly amazed seeing them in their natural habitat. This is the location of the colony: Peninsula Walkway, Kaikoura 7300, New Zealand Afterwards we went to the hostel (Dusky Lodge Backpackers) and enjoyed our last night in New Zealand, super happy with the experience we had had and "sad" to go back home... but, to be honest, we were going back to continue living life in Australia, so we couldn't complain either! Day 8: We return home, Australia. The icing on the cake was returning from New Zealand without having to fly for 30 hours. In just three hours, we were home, jet-lagged free! Author Profile Gonzalo Pasquier is a young Spanish adventurer and photographer. He lives and works for travel, and his photographs are inspired by his passion for nature. At Blue Banana, we are fortunate to have him on our team, and his mission is none other than to make this new adventure a reality and capture it in our brand through content with a unique perspective that takes things to the next level. This isn't about what we do, but how we do it. And Gonzalo Pasquier is the man in charge of proving it.
Exploring the wild island of Java
Hello! I've been thinking about visiting Indonesia for a few years. I've always been drawn to the tropical climate, the jungle, the crystal-clear waters, and the culture of Asian countries....
Exploring the wild island of Java
Hello! I've been thinking about visiting Indonesia for a few years. I've always been drawn to the tropical climate, the jungle, the crystal-clear waters, and the culture of Asian countries. What I didn't know back then is that after deciding to take this trip, I would fall in love with this country again. It's a very large country. To give you an idea, Indonesia is made up of more than 17,000 islands, and naturally, you had to choose one of them to begin your adventure. The criteria for choosing one was very simple: my adventure partner and I had two things clear: we wanted adventure and little tourism, and Java met these requirements, so we decided to spend two weeks exploring the east of the island. Upon landing in Jakarta, the capital of Indonesia, we took an internal flight to Surabaya, a city located on the eastern tip of the island and the starting point of the trip. We rented a car and began our adventure through East Java for the next two weeks. Since a day-by-day trip would be too long, I'll divide this post into five locations, five incredible spots located throughout the far east of Java: 1. Rainbow Village, Malang. A small village where the roofs are painted in colors by children to attract tourists. 2. Lumajang, the village of waterfalls . 3. Tabuhan and Menjangang Islands 4. Ijen Volcano Day 5: Back Home! I'm attaching a MyMaps so you can see the route: 1. Rainbow Village, Malang Our first stop on the trip, located about four hours from Surabaya, was our closest option for spending the first night. When we arrived, it was already dark, so we set our alarms and were there early in the morning, in Rainbow Village. This village has a beautiful history behind it; it was painted like a rainbow by students from the University of Malang a few years ago. What was once a village with very few resources and a rather precarious way of life began to attract tourism to improve the living conditions. Today, if you visit East Java, it's a must-see stop, to meet its people and lose yourself in its colorful streets. After spending our first day in this area, it was time to return to the hostel; the next day was a busy day of driving to reach one of the most impressive areas on the entire island. 2. Lumajang, Indonesia's most impressive waterfalls Our base for the next three to four days was the small town of Lumajang. Once we were settled into the Dear Traveler hostel, it was time to explore the area. The alarm went off, and there we were, ready to take advantage of the best daylight. I'll leave you here all the waterfalls we visited, in no particular order, although I already know which is my favorite, and you? Tumpak Sewu Known as the waterfall of a thousand falls, I don't think it needs any explanation. I remember that day, we were at the top even before dawn, only the sound of the water and the jungle could be heard; I've rarely felt so peaceful. Little by little, the sun began to rise, illuminating the scene with a soft light. It was the perfect moment to take the drone and enjoy it for a while. The descent to the waterfall was a great adventure, crossing rivers and holding onto bamboo canes. When I arrived, I couldn't believe what I was seeing; that feeling ran through my body. For a moment, I thought I was on another planet. I'm leaving you with these photos; as they say, a picture is worth a thousand words. Goa Tetes Continuing along the river in the opposite direction to Tumpak Sewu, we came across this spectacular system of waterfalls and caves. The best part was that the water was warm, like a spa in the middle of nature. Kabut Pelangi, Kapas Biru: each one more spectacular than the last. Just the descent through the jungle to these waterfalls was worth it. Every now and then, we came across a local whose fields were located near the river, a spectacular landscape. Giant ferns and stone walls covered in tropical plants, just insane. We never tired of seeing waterfalls and jungle, although on our last day in the Luamajang area, we decided to drive south, an hour from our accommodation. We wanted a beach and a motorcycle, and it wasn't hard to find one. We rented a motorcycle from a local for about 20 euros and had a great time driving along the volcanic sand beach at sunset, alone with no one else, enjoying the sea breeze, the peaceful atmosphere of the local fishermen, and everything around us. 3. Tabuhan and Menjangang Islands The adventure continued along the east coast of Java, heading for some small islands located an hour away by boat. The first stop was Menjangang Island, closer to Bali than Java, so it was inevitable to run into the occasional tourist. The island's inhabitants are a bit strange; they have brown fur and four legs—they're deer! It was curious to see them running across the island. What you can't miss is a snorkel, a pair of fins, goggles, and a snorkel, and you can enjoy one of Java's most impressive seabeds. We saw many species of fish, starfish, and other creatures, surrounded by spectacular coral. The next stop was Tabuhan Island, smaller than the previous one and closer to the coast of Java. And now we had it all to ourselves! There was absolutely no one else there, what a feeling... The dips were very frequent, it was hard to stay out of the water in the heat. 4. Ijen Volcano The adventure continued with a visit to one of Java's most iconic sites, the Kawah Ijen volcano, which houses the world's largest acidic lake, perfect for a swim (just kidding, don't even think about putting a single toe in that water). It was a three- to four-hour hike to the summit, followed by a descent into the crater to see the blue fire, with miners working tirelessly—a harsh reality that's hard to accept at the time. The blue fire I mentioned is the result of sulfur combustion in a gaseous state, which is not recommended for breathing, so they rent gas masks right there before the climb. Note: If you go, I ask you to respect the miners. Even though it is a tourist attraction, there are people working in very harsh conditions, and sometimes we tourists get in their way while they carry baskets full of sulfur that can weigh 70-80 kg. The hike was definitely worth it, as we enjoyed one of the most beautiful sunrises of the entire trip. Just bring some warm clothes, because it's freezing up there. 5. Bromo Volcano and Madakaripura, the sacred area of East Java The last two stops of our adventure. We returned to Malang from Ijen, a full day's hike, and settled there again to begin the trek to Bromo. The active Bromo volcano, at an altitude of about 2,300 meters, is one of the busiest tourist spots in East Java. That's why we decided to avoid the crowds and go early in the day. In Malang, we met up with a local friend, rented some trail bikes, and drove two hours into the night to arrive at the top at sunrise. The road is quite dangerous, so I don't recommend it if you're inexperienced on a motorcycle. In that case, there are many tours that take you there in a jeep, which is much safer, but the window for improvisation is closed, and that's something we don't like much, hehe. Once you get there, be prepared to get cold; the change from an average of 30C to 0 or below is brutal. I'm not exaggerating. But it's definitely worth it... Gazing at that Martian landscape at dawn is definitely worth it. After making the most of the best possible light, it was time to descend to the Bromo Savannah, a sea of sand where jeeps and motorcycles crisscross like crazy, horseback riders cross the road... I swear I'd never seen anything like it, it was literally like being on another planet, hard to explain. It was time to climb the Bromo ring and see the volcano from above. A slip here could cost you your life, so be very careful where you step. We had swallowed enough sand, so we grabbed the bikes and headed back to Malang, our base camp. The last stop of the trip was the immense Madakaripura Waterfall, a sacred area for the locals and a 200-meter waterfall, one of the tallest in all of Java. Exhausted by this point in the trip, from the sheer number of adventures we'd packed into our lives, from waking up every day at dawn and staying up every sunset, from the hours of driving, riding a motorbike, boating, and snorkeling—two weeks nonstop—it was time to regain some energy. We flew to Jakarta from Surabaya to spend the last day of the trip there, more relaxing, back to civilization. Here we conclude this adventure and this brief travel diary. I can't recommend Indonesia enough; neither my photos nor my words can describe what we experienced during these two weeks. We had high expectations, but they were certainly exceeded by its landscapes, nature, and, above all, its people. In case you're still hungry for more, here's a video I made about the trip: https://youtu.be/cV6N99Pl2wo Author Profile Pablo García , a Galician and international traveler, a lover of adventure, remote places, and cultures. He's eager to share with the world what he sees through his photos and videos. He's one of the content creators we at Blue Banana have the pleasure of working with, because we love the nature of his travels and his thirst for adventure.
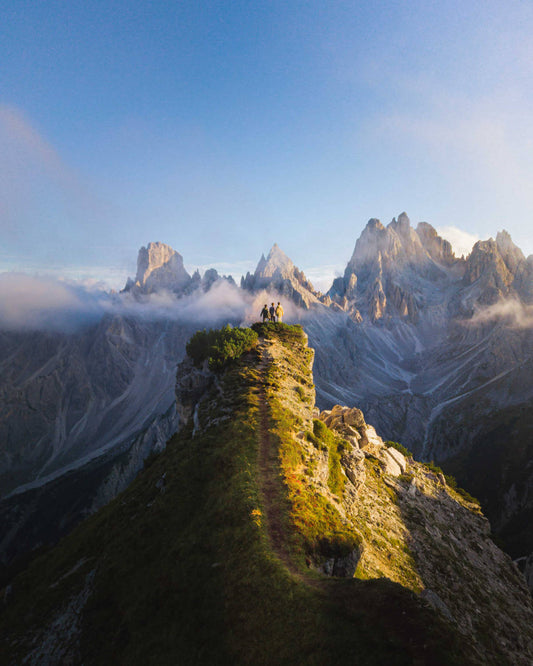
The Dolomites. Welcome to the adventure
Hello! This space will be dedicated to sharing our travels and experiences, so that when you want to explore, you'll know the best destinations, what places to visit, where to...
The Dolomites. Welcome to the adventure
Hello! This space will be dedicated to sharing our travels and experiences, so that when you want to explore, you'll know the best destinations, what places to visit, where to stay and eat, and other good things to know before packing your bags. The first blog post is dedicated, of course, to the Italian Alps, also known as the Dolomites. This is the place where we went to film the video for the new Fall-Winter collection, and many of you asked us to post the route because you loved it. Well, here's everything you need to know to plan a perfect trip! The Dolomites are a mountain range located in northern Italy, and are a popular destination during the winter months due to the excellent facilities available for snow sports such as skiing and snowboarding. What's less well-known about this area is its beauty during the rest of the year, offering opportunities for hiking, climbing, mountain biking, and paragliding for the more adventurous. And that's why we decided to go there, for its spectacular scenery, the variety of activities, and because it's a less crowded place outside of the ski season. Our idea was to take a 4-5 day trip visiting the most spectacular sites, so we checked the weather to avoid going on rainy days, booked dates, bought plane tickets... and off we went! The places we saw were the following (links to the days): Day 1: We arrived in Bologna, headed for the Dolomites in the van, made our only visit of the day, to Lago di Caresse, and slept at the Hotel Classic In in Ortisei, Val Gardena, after some historic pizzas at the ristorante Erica. Day 2: We watched the sunrise at Alpe di Siusi, then did a hike on the Seceda 2500 and a scenic helicopter flight . Day 3: We watched the sunrise at Lago di Braies and went to explore Tre Cime di Lavaredo, where we ate and were caught in the fog in search of the most beautiful cliff in the Alps. Day 4: We hiked to Lago di Sorapis and on the way back, we tried again to reach the Cadena di Misurina cliff. The result was unbeatable! Day 5: Back Home! Before starting with the sheet music, I'll leave you with a MyMaps so you can see the route we took and get your bearings a little better: Day 1: Arrival in Bologna and visit to Lake Caresse. We started the trip on September 16th from Bologna, the city we flew to from Spain. It's a bit far from the Dolomites, but we booked it on short notice and it was the cheapest nearby airport. Here's a table showing the nearby cities and the driving time to Ortisei, a town in Val Gardena, the heart of the Dolomites: If you fly to Innsbruck, keep in mind that it's Austria, and car rental will likely be more expensive than in Italy. If you fly to Verona, you probably won't find any direct flights, as it has a small airport. So, I would recommend flying to Bergamo and renting a car there. Well, as you can see, it's not the most accessible place in the world, but that's the key to its charm, isn't it? One of the things you should know before you go is that, since it's on the border with Austria, every place has two names, one in Italian and one in German. Keep this in mind when you see road signs, as it can be very confusing. And speaking of roads, be prepared for tolls, because they're numerous, and they're not cheap! Our first stop was Lago Di Caresse, or Karersee in German, an incredible mountain lake less than 1 hour from Bolzano, the largest city in the Dolomites area. I recommend going late in the day because the light is spectacular, the peaks in the background take on an orange hue, and it's incredibly beautiful. Plus, you'll arrive late and probably won't find many people around. We paid €4 for parking, which is on the left if you're coming from Bolzano. And the best part is, you don't have to walk at all! The lake is just 20 meters across the road. AWESOME! We were there from 6 to 7:30 p.m. wandering around the area, circling it and recording clips for the new collection video... which, by the way, if you haven't seen the video, here it is: https://www.instagram.com/p/B3C9TZZDxuD/ After visiting the lake, we went to the hotel in Ortisei, Val Gardena. We showered and had dinner at Pizzeria Érica, a superb value for money. It was about €13 for pizza and beer, so not bad for a mountain paradise. Note: If you want to order a light beer, which you will, ask for a beer with lemon, because if you order a light beer, they'll probably bring you an Italian beer with a similar name that doesn't have lemon. You're welcome. With our bellies full we went straight to bed, because the next day we woke up early (5:30am) to leave the hotel at 6am and be there to see the sunrise at Alpe di Siusi at 7am. The first night we stayed at the Classic Hotel Am Stetteneck, where we paid €100 for a double room with breakfast included. With private parking and a great location, we definitely recommend it! Day 2: Sunrise at Alpe di Siusi, hike through Seceda 2500, and scenic helicopter flight. As I told you, we woke up early and headed straight for Alpe di Siusi, which is, after all, a vast green meadow filled with wooden cabins and cows, surrounded by very photogenic mountains. I recommend catching the first light of day, so you can see it like this: We filmed there for about an hour and a half, with the whole place to ourselves. The great thing about going during the off-season is that you'll meet very few people, especially if you get up early! Alpe di Siusi is a very large area, so to get exactly where we went, enter Malga Sanon on the map. It's a hotel/restaurant where you can park for free. If you go, be careful with the dirt road at the end; it's a real pain ;) We finished filming in Alpe di Siusi around 8:30 a.m., and headed back to the hotel to take advantage of the included breakfast, which was a buffet... the best thing after spending over an hour filming! After a historic breakfast, we headed to our next destination, Seceda at 2,500m, which can be reached in two different ways: either a two-hour walk uphill (1,000m elevation gain) or by taking the funicular, which costs €32 and takes 15-20 minutes to reach the top. We took the funicular, which was a 10-minute walk from the hotel, and were at the top by 11:30 a.m. Seceda was one of the places we found the most people, as it's very popular, aside from the lunchtime arrivals. You'll see why: We spent the night wandering around the area until 2:00 p.m., flying the drone and making croquettes on the grass, and then we went down to eat. We didn't have to worry too much about the restaurant, considering that all the restaurants close at 2:00-2:30 p.m. (in Italy, they eat early). We ate at the bar at the funicular station, where the food wasn't bad, but it wasn't delicious either. Note: If you have good eyesight, on the last stretch of the funicular reaching the top of Seceda, you might see marmots basking in the sun. They camouflage themselves very well, but they're huge! As you can see, we were making good progress. It was barely time for lunch, and we'd already been to two places where you could spend a whole day in each. The best part was yet to come: a fucking helicopter flight! Once we finished eating, we rested a bit on the restaurant's terrace and then grabbed the van to head to the Elikos headquarters, the only company that offers panoramic helicopter flights over the Dolomites. It was a 20-minute drive from Ortisei, so it was a natural fit for us. We took the shortest (and cheapest) flight, 15 minutes, €120 per person. Not bad, huh? I know, it's not cheap, but it's so worth it. I'd never been on one before, and it's one of the craziest experiences I've ever had! We saw the places we had visited that morning from a whole new perspective, and seeing mountains and mountains as far as the eye could see was mind-blowing. Still pumping with adrenaline, we hopped into the van and, while discussing the crazy flight, headed to the hotel where we would spend our second night: Hotel PörnBacher, 20 minutes from the most photographed lake in the world, Lago di Braies, or Pragser Wildsee, depending on who you ask. That night we had dinner at Ristorante Christl, 5 minutes from the hotel, and I highly recommend it too, because they were very fast and the price-performance ratio was good. After some good pizzas we went to bed early, because, of course, we had to get up early again the next day! Day 3: Lago di Braies and Tre Cime di Lavaredo At 6 a.m. the alarm went off, we got ready and headed straight to Lago di Braies for the first shoot of the day. We arrived before the sun and were a little disappointed to see that the reflection of the lake we'd seen in the photos had been blown away by the wind. We started circling the lake, and half an hour later, mountains suddenly began to appear in the water, and we were all drooling! We started recording and taking the photos we had come for, and we didn't stop for 2 hours. Grades: - The water level can vary by 2 or 3 meters depending on the time of year. We went after summer and before the rains started, which is why the level was so low. If you go in March or April, when the thaw begins, the water level will probably reach the height of the wooden hut in the photo. Here's a photo taken by our contributor José Zepev, who found the lake much fuller! - Starting at 10 a.m., boats can be rented for €20 per hour. With our SD cards full of content, and after returning to the hotel for the included breakfast, we headed to the next spot of the day: Tre Cime di Lavaredo. Yes, you guessed it, it means Three Peaks, and that's precisely what makes this place so unique: the three rock masses that rise more than 500 meters from the refuge parking lot and almost 3,000 meters from sea level. And the craziest thing of all is that we saw people climbing them! Admission to the site costs €30 and is valid for 24 hours, so if you're camping or traveling in a campervan, you can sleep upstairs and pay the same as if you were going up and down on the same day. Our plan was to go around the three peaks and reach the refuge on the other side, Rifugio A. Locatelli Innekofler, where we ate a good plate of pasta and took a siesta like good Spaniards. Afterwards, we went behind the shelter to explore some caves we saw while we were eating, and they turned out to be small tunnels that connected to each other and took you to another side of the mountain. Once we'd eaten and seen the tunnels, the plan was to return to where we started and continue in the other direction to find a cliff we'd seen in videos and photos and were dying to see in person because it was amazing. So we retraced our steps, and in an hour we were back in the van to change our sweatshirts, lighten our backpacks, and begin the next hike in search of the cliff. And in the blink of an eye, while we were changing our sweatshirts in the van, a very dense fog arrived that made us question whether to go on the trip or not, because we couldn't see a damn thing! Anyway, of course, we went out to try our luck, and we found the cliff, yes, but not with the views we had imagined... Tired from a day of walking and disappointed at not seeing anything, we decided to fly the drone to try to get above the fog and see the sunset through our phone screen. And we did it! 300 meters above us, the sun was setting into a sea of orange clouds, and what a shot we got! With a bittersweet taste in our mouths, we returned to the van and headed for Cortina d'Ampezzo, a town full of designer shops in the middle of the Alps. There, we watched the Juventus vs. Atleti match and slept like logs at the Hotel Aquila after a pizza and pasta binge at the Pontejel restaurant, which wasn't bad, but nothing special either. Day 4: Lake Sorapis and Tre Cime Part 2: On day 4, we took it easy, waking up at 8:30 a.m. Wow! After two days of little sleep, that night felt like heaven. We had the usual buffet breakfast at the hotel and set off in a van to the starting point of the Lago di Sorapis hike. We arrived at Passo Tre Croci 15 minutes later and started hiking. The hike takes just under two hours, and the views are incredible: We arrived at Lake Sorapis with our legs aching badly, but as soon as we looked at the scenery, we forgot about everything—the color of the water was spectacular! We took a few photos and headed straight to a refuge 100 meters from the lake (Rifugio Alfonso Vandelli) for lunch. Note: It's a fairly remote location, and they don't have a payment terminal for food, so bring cash. I'd also like to recommend the vegetable soup, which I ate all by myself considering the cold weather. We finished eating and started talking to one of the waiters, who knew the brand and was following one of us. In the middle of the mountains, in a refuge lost in the middle of nowhere, and he already knew Blue Banana and Axel! We were quite amazed, to be honest. We started back, planning to return to the hotel, take a leisurely shower, and stroll around the town. We'd had a tough few days and we'd earned it. But things went awry; our thirst for adventure got the better of us, and we ended up heading for the cliff we'd climbed the day before. It was our last chance to do it! We paid the €30 parking fee again without a second thought, packed only what we needed, and started the hike running like wild boars, because there was still an hour of sunlight left and a half-hour walk to get there. Not to mention that it was still foggy when we arrived, but not as dense as the day before. We made it to the cliff just in time! And this time with a view, what a fucking blast! But the day didn't end there; we wanted more! So we climbed a little higher, set up the tent to shoot some footage, and watched the last sunset of the trip. After a crazy afternoon full of adrenaline, we started the journey back to the van. Super satisfied with the results of the last day, we had dinner at a random restaurant in Misurina, a town very close to Tre Cime, and headed back to the hotel in Passo Pordoi, a two-hour drive away… It's the other side of the adventurous spirit, I suppose. If we hadn't turned back in search of the cliff, we would have already been showered and ready for dinner by 9 p.m. However, by that same time, we hadn't had dinner, were exhausted, and still had two hours to go to get to the hotel, but the experience we had just had more than justified the situation! The hotel was called Col Di Lana, and like the rest, a double room with breakfast included was around €100. We wanted a hotel in Passo Pordoi because the next day, before heading to the airport, we wanted to take a mini-hike to the Fredarola refuge (less than an hour's walk) to see Lake Fedaia and the Marmolada in the background (the highest mountain in the Dolomites). Day 5: Back Home! In the end, we decided to take it easy and head back to Bologna early in case we hit traffic. We ate along the way in Treviso, at a very cheap but very good pizzeria called Zeus. If you go, you can park in Piazza Vittoria; it's a three-minute walk away and there's a fairly large parking lot. From there we went to the airport with sad faces but very grateful for the days we had spent, and we returned to Spain with full SDs and swearing not to eat pizza or pasta for many days! It was an incredible trip that completely exceeded all our expectations, both for the places we saw and the experiences we had, so I can't recommend it enough, and I'm more convinced that you'll love it! If you have any questions, please leave them in the comments and I'll be happy to answer them. Greetings, and continue the adventure! Author Profile Gonzalo Pasquier is a young Spanish adventurer and photographer. He lives and works for travel, and his photographs are inspired by his passion for nature. At Blue Banana, we are fortunate to have him on our team, and his mission is none other than to make this new adventure a reality and capture it in our brand through content with a unique perspective that takes things to the next level. This isn't about what we do, but how we do it. And Gonzalo Pasquier is the man in charge of proving it.